Thursday, February 25, 2010

Top 10 Favorites So Far

I'm officially 1/3 of the way through my goal, and only 2 months have passed!  Yay me!  I'm going to take some time to "reflect" and look back and pick my top 10 favorite new recipes I've made this year.  I would make these recipes over and over again.  They are in no particular order. 
  1. Neely's Tomato Soup
  2. Buffalo Chicken Sandwiches and Pizza
  3. Sour Cream Chicken Enchiladas
  4. Sour Cream Pancakes
  5. Cheesy Garlic Bread
  6. Sticky Roast Chicken
  7. Pioneer Woman Potato Skins
  8. Chicken Lime Nachos
  9. Beef Stew with Mushrooms
  10. French Breakfast Puffs
New Goal:
For the month of March, I am going to make low fat recipes- preferably Weight Watchers.  Spring break is coming up, and I really wanna lose some LBS!  (And no not Lindsey)

Pioneer Woman Pound Cake #36

For some reason, I was really craving something sweet tonight.

The case: 


Ingredients
3 sticks Butter
3 cups Sugar
5 whole Eggs
1 teaspoon Butter Flavoring
2 teaspoons Lemon Flavoring
3 cups All-purpose Flour
1 cup Sprite, 7-UP, Or Sierra Mist
 

Preparation Instructions

1. Preheat oven to 325 degrees.
2. Cream butter. 

3. Add sugar, 1 cup at a time, mixing after each addition. 
4. Add eggs, 1 at a time, mixing after each addition. 
5. Add butter and lemon extracts and mix well. 
6. Add flour, 1 cup at a time, mixing well after each addition. 
7. Add soft drink, then mix together until combined. Scrape sides of bowl, then mix briefly.
8, Pour into a greased Bundt pan and bake for 1 hour to 1 hour 10 minutes, until the cake is no longer jiggly.
9. Remove cake from oven and invert pan until cake drops out. Slice and chow down!


The ruling:
Even though a big chunk of this stayed in the bunt pan, it was still pretty.  It was very moist, but I think would be tastier with a powdered sugar and milk icing over the top.  But to be honest, I'd rather have Sundrop cake any day.  Rating: 6 stars

Beef Stew with Mushrooms #35

Another one of Pioneer Woman's recipes.  This is a first for me, besides roast in a crock pot, I don't cook with beef.  But I love roast and I love mushrooms and I love roast and gravy over noodles- this couldn't look better.

The case:
Ingredients
2 pounds Beef Stew Meat (sirloin Cut Into Cubes)
2 Tablespoons Flour
4 Tablespoons Butter
2 Tablespoons Olive Oil
2 whole Shallots, Minced
3 cloves Garlic, Minced
8 ounces, Cremini Or White Button Mushrooms
½ cups Red Wine
½ cans Beef Consomme
Salt And Pepper, to taste
Pasta - Cooked And Drained
2 sprigs Fresh Thyme
2 Tablespoons Flour

Instructions:
1.  Sprinkle flour over meat. Toss to coat.
2.  Melt butter with olive oil in heavy pot. Sear meat over high heat in batches; remove to a plate when brown.
3.  Add shallots and garlic to pan (without cleaning); saute for 2 minutes over medium-low heat. Add mushrooms and cook for 2 minutes.

4.  Pour in wine and consomme (and add an extra half can of water at this time as well.) Then add salt and pepper to taste, and stir. Bring to a boil, then add back into the mix the browned meat. Reduce heat to low. Add thyme sprigs to pot.
5.  Cover and simmer for 30 to 45 minutes.
6.  After that time, mix 2 tablespoons flour with a little water and pour into the stew. Allow to cook and thicken for ten more minutes. Turn off heat and allow stew to sit for 15 to 20 minutes before serving.

The ruling:
I'm going to let my first attempt speak for itself. 


Apparently you shouldn't always listen to Rachel Ray and let the pot be waiting on you.  First, I smelt something burning, so I put the butter in thinking it was because nothing was in there.  Well, the butter started smoking like a freight train.  I turned off the eye, moved the oven over, and started fanning around the smoke alarm.  About that time, I heard a "whosh" sound, you know the kind you hear when something catches fire in a movie.  I don't think I've ever heard a sound like it in real life.  I turned around, and there were flames at least 6 inches over the pot.  I'll admit, I panicked a bit.  That has never happened to me before.  I knew grease fires couldn't have water poured on them, but what is a grease fire?  Finally, I remembered fires have to have oxygen, so I quickly put the top over the pot.  I know, back to 2nd grade.  My house was full of smoke.  I still don't see how butter cause that big of a fire or released all that smoke.

Attempt two went much better. 


I did mess up the flour in the water.  I made a paste and it didn't incorporate into the stew.  Apparently, you are supposed to double the water to the flour, but it wasn't too hard to pick out.  I put in cornstarch by itself instead, and it worked beautifully.  I love roast beef, and this was extremely good.  I only used 1/4 cup of wine.  I'm not a big fan of cooking with wine.  The mushrooms were amazing. (I used baby portabellas)  I will put more in next time.

Tuesday, February 23, 2010

Sausage and Cheese Crescent Squares #34

I make two recipes that are similar to this one.  One is a breakfast casserole.  Pretty much the same casserole but substitute eggs for the cream cheese.  Another is the same except no cheddar on top.  I love the flavor of sausage and cream cheese together- especially in stuffed mushrooms. 


The case:

Ingredients:
* 2 cans crescent rolls
* 1 lb sausage
* 8 oz cream cheese
* 2 cups shredded cheddar cheese

Directions:
1.  Heat oven to 375.
2.  Unroll 1 crescent and place in 13 x 9 inch glass baking dish.  Press over bottom.
3.  Cook and drain sausage.  In same skillet, cook cream cheese over low heat until melted.  Add sausage back to skillet and mix to combine.
4.  Lay mixture over crescents.  Sprinkle with cheese.  Carefully lay second crescent rolls on top. 
5.  Bake 21- 26 minutes.

The ruling:
I have to admit this isn't very visually stimulating, but it is still tasty.  I think this would make a great brunch dish.  The cheddar didn't make that much of a difference to my original recipe, but I will definitely be making it this way again.  Michael says I need to start giving my recipes a rating.  I think 5 stars to too difficult, so I'm doing 1-10 stars.  I'd give this 7 stars.   

Monday, February 22, 2010

Chicken Enchilada Soup

This is my go to soup.  I make it I'd say about every other week.  Michael says this is his second favorite soup I make- a close second at that.  There are two amazing things about this soup: 1) It goes in the crock pot in the morning and is done when you get home and 2) Its low fat!


Ingredients:

1-2 cans chili beans
1/2 bag frozen corn
1 can enchilada sauce
12 oz can chicken broth
2 cans Rotel (I put these in the food processor first)
1/2 packet taco seasoning
1 packet ranch seasoning
3 chicken breasts
cilantro-very important to have fresh- chop 2 tablespoons
fresh juice of one lime
1 tsp garlic powder
1 tsp onion powder
1 tsp cumin
1 tsp salt

Topping
Fat Free Sour Cream
Mexican Cheese Mixture
Tortilla chips

Directions:
Place enchilada sauce, Rotel, and chicken broth into a slow cooker and mix.
Add the rest of seasonings and stir to blend.
Lay chicken breasts on the mixture until just covered by other ingredients.
Cook on low for 6-8 hours.

Remove chicken and shred. Put chicken back into soup and add beans and corn. Cook 2 more hours.

Serve, mixing in a spoonful of sour cream and cheese. Add crushed chips or eat like a dip. Add extra lime juice and/or cilantro if desired.

Wednesday, February 17, 2010

Salsa and Chicken Lime Nachos #32 & #33

This recipe is truly my happy place. For some reason at restaurants, I'd say 90% of the time my favorite part of the meal is the appetizer. I love tailgating/football type food too. Pretty much anything you can eat with your hands while standing can go in these categories- dips, wings, stuffed mushrooms, potato skins, calamari, cheese sticks, etc. My favorite recipe parties have been the appetizer exchange and tailgating recipes.  The salsa recipe is the Pioneer Woman's and the rest is a combination of several nacho recipes I found.  The best thing about this is you can easily adjust it to your taste.

The case:
Ingredients:
* 1 can (28 Ounce) Whole Tomatoes With Juice
* 2 cans (10 Ounce) Rotel
* ¼ cups Chopped Onion
* 1 clove Garlic, Minced
* 1 whole Jalapeno, Quartered And Sliced Thin
* ¼ teaspoons Sugar
* ¼ teaspoons Salt
* ¼ teaspoons Ground Cumin
* ½ cups Cilantro (more To Taste!)
* ½ whole Lime Juice

Instructions:
Combine whole tomatoes, Rotel, onion, jalapeno, garlic, sugar, salt, cumin, lime juice, and cilantro in a blender or food processor. Pulse until you get the salsa to the consistency you’d like—I do about 10 to 15 pulses. Test seasonings with a tortilla chip and adjust as needed.

Refrigerate salsa for at least an hour. Serve with tortilla chips or cheese nachos.

Now you could stop there if you want!  I promise you won't be disappointed.  Warning: This makes A LOT.  I ended up spilling it everywhere when I poured it into a bowl that wasn't big enough.  Next time I will simply half the recipe.  I know, I'm a smart one!

Now for the nachos!

First the chicken.  This recipe came from Recipezaar.

Ingredients
2 boneless skinless chicken breasts
1/2 cup lime juice
1 teaspoon pepper
1 teaspoon chili powder

Directions:
1. Cut chicken into small strips.
2. Combine lime juice, pepper, chili powder and olive oil and use it to coat chicken. Marinate chicken for at least half an hour.
3. Cut chicken in a pan on medium heat with juices until cooked throughout.  Shred chicken more if desired.


Now build your nachos on an oven-safe plate.  This is the fun part and where your creativity and preferences come out. Here are the three simple ingredients I used as a "base"- chips, refried beans, and cheese.


I individually spread bean dip on each chip.  Not much, on maybe half of the chip.  I put down a layer of those and sprinkled cheese over the entire thing.  Then, I did another layer the same way.


Live and learn- I should've put more cheese!  

Next, put the nachos in the oven @ 375 for 5 minutes, or until cheese is melted.


See what I mean about more cheese? You can never have enough cheese!

Then I sprinkled the chicken, spooned salsa, tore cilantro leaves, and dolloped sour cream over the top.
Why doesn't my "dollop" ever look like on the commercials? 


 Michael is going to so mad at me for making these while he is at work!  There is sooo much flavor in every bite! To die for!  I tried the chicken straight out of the pan and thought "Oh No" this is way too limey, but its not on the whole package.  Its perfect!


Looks like I should've had a friend over.  


The ruling:
These were phenomenal!  I honestly don't think I would change a thing.  I read in a nacho article online how important it is to have a warm and cool contrast with the nachos, and I agree 100%.  There was not only a temperature contrast here, but a flavor one as well!  I loved these in case you didn't already figure that out!

A work in progress

I'm going to make a list here of some of my favorite dishes that I either A) don't have a recipe for or B) have tried to make before, but failed. So anyone with recipes/advice on these dishes send them my way! lorifgreer@gmail.com or on Facebook

1. Homemade Biscuits
2. Sausage Gravy (I'm trying this for the 2nd time tonight)
3. Apple Pie
4. Fajitas
5. Homemade Pizza Dough and Sauce
6. Creamed Spinach (without onions)
7. Creamy Broccoli and Cheese (side dish)
8. Homemade bread (all kinds)
9. Caesar Salad
10.Red Velvet Cake
11.Doughnuts

Tuesday, February 16, 2010

Sour Cream Pancakes #31


I love the tangyness of sour cream in recipes, which is weird since I don't like it by itself. I can't really imagine a sour cream taste with syrup. But hey, I'm willing to try anything once!

The case:
Ingredients:
1 cup sour cream
7 tablespoons all-purpose flour
1 tablespoon sugar
1 teaspoon baking soda
1/2 teaspoon salt
2 large eggs
1/2 teaspoon vanilla
butter
syrup

Directions:
1. Place a skillet or griddle on medium-low heat.
2. Place sour cream in a medium bowl. Dump in the flour, sugar, baking soda, and salt.
3. Stir together very gently. Stop short of mixture being totally combined.
4. Whisk the eggs in a separate bowl.
5. Add the vanilla and stir to combine.
6. Pour the egg mixture into the flour/sour cream mixture.
7. Stir mixture gently. Don't worry about the mixture being totally combined. A little white and yellow showing is fine.
8. Melt about a tablespoon of butter in skillet. Pour the batter into the skillet 1/4 cup at a time.
9. Cook pancakes and serve with butter and syrup.

The ruling:
These just might be the pancakes best I've ever had. I loved them! I loved the consistency. I loved the flavor. They're not your typical fluffy buttermilk style, which I also love, but these are great for something different. My only complaint was next time I need to double the recipe.

French Breakfast Puffs #30


I love breakfast food. Eggs, pancakes, bacon, biscuits, gravy, etc. etc. I'm so happy to be trying two of the Pioneer Woman's breakfast dishes today for lunch. This snow has got to stop or I'm going to gain 10 pounds!

The case:

Ingredients:
3 cups flour
3 teaspoons baking powder
1 teaspoon salt
1/2 teaspoon nutmeg
1 cup sugar
2/3 cup nonhydrogenated shortening, at room temp
2 eggs
1 cup milk

For cinnamon sugar crust:
1 1/2 cups sugar
3 teaspoons cinnamon
2 sticks of butter

Directions:
1. Spray muffin tin (12 muffin size)with cooking spray
2. Preheat oven to 350 degrees.
3. Whisk together in a bowl: flour, baking powder, salt, and nutmeg. Set aside.
4. In another bowl, with a mixer or a whisk, cream together one cup of the sugar and the shortening.
5. Add the eggs and mix to combine.
6. Add half of the flour mixture and mix in, then half of the milk and mix in. Continue with the other halves, mixing until completely combined.
7. Pour batter into prepared muffin cups to just over half full. (You don't want these going up over the top of your pan too far or they'll fall apart when you roll them around in the butter later.) I used an ice cream scoop to get even amounts and quick release into the muffin cups.
8. Bake for 20-25 minutes (about 12-15 minutes for mini muffins) until tops are golden.
9. While the muffins are baking, melt the butter. Place it in a bowl big enough to roll the muffins around in comfortably. In another bowl combine the remaining 1 1/2 cups sugar with the cinnamon and stir together.
10. When the muffins are out of the oven, let them cool briefly so you don't get burned. Then take the still very warm muffins and roll them first in the bowl with the melted butter, to coat on all sides. Then roll them in the cinnamon sugar completely to coat. You're going to want to eat that first one. And you should just go ahead. They smell too good not to. Repeat with remaining muffins and serve immediately.

The ruling:
Yes, you read this correctly. You roll these muffins in butter and then a cinnamon-sugar mixture when they come out of the oven! Absolutely delicious! Make sure not to put too much batter in the muffin tins like I did. The tops of the muffins kept coming off. Next time I'll use cinnamon instead of nutmeg in the batter. I'm not a big fan of nutmeg. These would be wonderful as mini-muffins- perfect for a shower or brunch.

The Pioneer Woman Cooks

Okay, its official I'm obsessed. I have now made 4 recipes from this book in 4 days! And there are sooo many more I can't wait to try! I just had to share the book.

Monday, February 15, 2010

Maple Pecan Scones #29


Another recipe from The Pioneer Woman Cooks. This just sounded too good to be true, but I've tried to make scones before and they were a disaster.

The case:
Ingredients:
Scones:
* 3 cups all-purpose flour
* 1/3 cup sugar
* 5 teaspoons baking powder
* 1 teaspoon salt
* 1/2 pound (2 sticks) butter, chilled
* 1/4 cup pecans, plus more for sprinkling if desired
* 1 large egg
* 3/4 cup heavy cream

Maple Icing:
* 1 pound powdered sugar
* 1/4 cup whole milk
* 4 tablespoons (1/2 stick) butter, melted
* Splash of brewed coffee (I didn't use)
* Dash of salt
* 2 teaspoons maple extract

Directions:
1. Preheat the oven to 350 degrees
2. Stir together the flour, sugar, baking powder, and salt in a large bowl
3. Cut the butter into small pieces, then cut the butter into the flour (using a pastry cutter or a food processor) until it looks like crumbs
4. Stir the pecans into the mixture
5. Mix the egg and cream together and add to the mixture
6. Stir together until just combined
7. Turn the mixture out onto a clean, flat surface (it will be EXTREMELY crumbly, but don't worry!)
8. Push the crumbly dough into a ball with your hands
9. Gently roll out with a rolling pin into a 10 inch round
10.Cut the round into 8 wedges and transfer to a baking sheet(sprayed with baking spray or lined with parchment paper)
11.Bake for 22-26 minutes until they are just starting to brown
12.Allow to cool before icing
13.Stir all the icing ingredients together until smooth
14.Generously pour the icing over the scones and sprinkle with more pecans, if desired

The ruling:
My scones were crumbling and the icing was way too sweet. I know these have potential though. I just can't do it. I hate baking...

Parmesan Lemon Herb Brown Rice #28


I love rice, and its a perfect side dish for fish. This sounds different and looks delicious!

The case:

Ingredients
* 1 1/2 cups brown rice (long, medium or short)
* 1 small onion, finely chopped
* 1 tablespoon olive oil
* 1/2 teaspoon salt
* 2 1/2 cups low sodium chicken broth
* 1 ounce parmesan cheese, grated (about 1/2 cup)
* 1/4 cup fresh parsley, minced
* 1/8-1/4 cup fresh basil, minced (original is 1/4 cup)
* 1 lemon, juice and zest of (original is 1/2 tsp)
* 1/8-1/4 teaspoon ground black pepper

Directions
1. Adjust an oven rack to the middle position.
2. Preheat oven to 375°F.
3. Spread rice in a 8x8 glass baking dish.
4. Combine the onion, oil, and salt in a medium saucepan. Cover and cook over medium-low heat, stirring occasionally, until the onion is softened, 8-10 minutes.
5. Stir in the broth and bring to a boil.
6. Once broth is boiling immediately pour it over the rice.
7. Cover the baking dish tightly with a double layer of foil.
8. Bake until rice is tender, about 1 hour 10 minutes.
9. Remove baking dish from oven, uncover, and fluff the rice with a fork.
10.Stir in the parmesan, parsley, basil, lemon juice, lemon zest and pepper.
11.Cover the dish with a clean kitchen towel and let stand for 5 minutes.
12.Uncover and let the rice stand for 5 minutes longer before serving.

The ruling:
Can I first say I love in the directions where it says to cover the dish with a clean kitchen towel? I mean what else would you use? I liked this rice. I didn't love it. It was very lemony. I probably won't be making it again.

Salmon with Creamy Dill Sauce #27


I'm really stepping outside of my comfort zone today. This was supposed to be our Valentine's Day dinner, but I got lazy and made that soup instead.

The case:
Ingredients
* 1 1/2 cups mayonnaise
* 1/2 cup prepared mustard
* 1 teaspoon chopped fresh thyme
* 1 teaspoon dried oregano
* 1 teaspoon chopped fresh basil leaves
* 1 1/2 pounds salmon fillets
* 2 teaspoons dried dill, or to taste

Directions
1. Preheat oven to 375 degrees F (190 degrees C).
2. In a bowl, stir together mayonnaise and mustard. Stir in thyme, oregano, and basil. Place salmon fillets on a baking sheet, and spread with the mayonnaise mixture. Sprinkle with dill weed.
3. Bake in preheated oven for 30 to 40 minutes, until the salmon is easily flaked with a fork.

The ruling:
I made this with all dried herbs and put the juice from half a squeezed lemon in the mayonnaise mixture. I just can't eat fish without citrus. This was not my favorite the way it was cooked, but I want to try it again because I think it has good potential. I got this off of allrecipes.com and several reviews suggested using a cup of plain yogurt and 1/2 cup mayo. One person also recommended seasoning the salmon with salt and lemon juice first. I want to try it with these changes. Plus put the dill on the salmon instead of on top of the cream. The flavors were good, but the cream was a little heavy and the flavor didn't seep down into the fish.

Potato Skins #26


While browsing other "foodie/recipe" blogs I came across a group that was obsessed with Pioneer Woman cooking. Now, I believed this was some old fashioned/Betty Crocker type cookbook and didn't pay much attention. For Valentine's Day, Michael took me to Barnes and Noble, which only a book lover would understand. While browsing cookbooks, I saw one titled The Pioneer Woman Cooks. Now I'm not sure whether this is what that website was referring to, but if it is I'm hopping on the bandwagon! Ree Drummond is the author and I have now (in the past 3 days) read through this cookbook 5 times! Its more of a story, a love story at that. The recipes are simple and described beautifully. There are pictures for every step! This has officially become my favorite cookbook. After marking almost every page with Post-its, I decided to check out her website. And then I spent hours and hours there! There are tons of more recipes and photos and stories and oh so much more!

Okay, I've calmed down. But when I'm excited about something, I'm passionate about it. I admit I have a habit of collecting cookbooks and then not using them. This is a fight I have with my wonderful husband. He believes they are not only a waste of money, but of space as well. But what he doesn't understand is that yes I get most of my recipes from friends or the internet, but I still learn stuff and get ideas from those cookbooks. I'll admit I don't use cookbooks to cook as much. Well friends, that has all changed with The Pioneer Woman- you're going to be hearing about this one a lot!

Check out her website. There are at least 15 other recipes I found on there that I can't wait to try out!
http://thepioneerwoman.com/

So here is the first one! I just happened to have all these ingredients and needed to fix myself a lunch. I halved the recipe for just me- oh and because I just had 4 potatoes.

The case:
Ingredients:
* 8 slices thick-cut bacon
* 8 russet potatoes, scrubbed clean
* Canola (I used EVOO)
* Kosher salt
* 1 1/2 cups sharp cheddar cheese
* 1 cup sour cream
* 4 green onions, sliced (I omitted these)

Directions:
1. Preheat oven to 400.
2. Fry the bacon. (I cooked mine in the oven at 400 for 20 minutes)
3. Wash the potatoes and rub the skins literally with oil. (I added salt here) Place on a baking pan and bake for 45 minutes- 1 hour, until the potatoes are fork tender.
4. Slice the potatoes in half lengthwise.
5. Scoop out potatoes; leave a small margin of potato in the skins.
6. Brush both sides with oil and salt both sides liberally.
7. Place the skins cut side down on the pan and return to the oven.
8. Bake for 7 minutes and then flip to the other side.
9. Bake for 7 minutes more.
10.Grate cheddar.
11.Chop bacon into bits.
12.Sprinkle cheese into each potato skin.
13.Sprinkle with bacon and return to the oven just until the cheese melts.
14.Just before serving, spoon 1 Tablespoon sour cream on each skin and sprinkle with sliced green onions.

The ruling:
I knew I was that excited about this cookbook for a reason. These were absolutely divine! I scooped out to much of the potatoes, but that is an easy fix for next time. Plus I made loaded mashed potatoes with the leftover filling that are now in refrigerator for me to cook for supper! I ate these with ranch dressing. The sour cream didn't do that much for me. I can't believe how crisp and full of flavor these are. They're better than restaurant versions! These are the perfect tailgating food!

Sunday, February 14, 2010

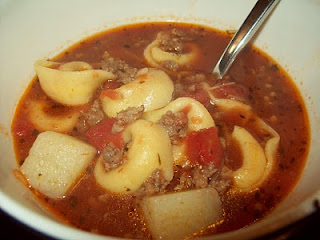
Italian Sausage Tortellini Soup #25


I'm not sure I should even be putting this on here. Recently I received several soup recipes from a friend at school. A couple of those had Italian sausage as an ingredient. To be honest, this doesn't sound good to me, but I don't believe I've ever tried it either. The recipe I wanted to make of hers also called for cheese tortellini and a couple of veggies that I'm positive I don't care for. But there was something about this Italian sausage thing that I wanted to look into. So I went to allrecipes.com and searched for soups containing Italian sausage- okay I'm apparently the only person who hasn't heard about this. Apparently the Olive Garden has some wonderful soup with Italian sausage. Anyways, I looked through about 5 recipes and then combined what I thought sounded good into one. It's a very strange mixture, so to be honest I have no idea how it is going to turn out!

The case: (By Me!)
1 pkg Italian sausage
2 garlic cloves minced
1 can stewed tomatoes
32 oz beef broth
1 cup water
1 can tomato sauce
1 package onion soup mix
1/2 teaspoon dried basil
1/2 teaspoon dried oregano
1/2 teaspoon cayenne pepper
2 cups cheese tortellini
6-7 potatoes, peeled and chopped into cubes

Directions:
1. Remove casings and fry Italian sausage until brown on medium.
2. Add minced garlic to pan and cook about 2 more minutes.
3. Pour beef broth, water, stewed tomatoes, tomato sauce, onion soup mix into pot and stir.
4. Add cayenne, basil, and oregano. Stir.
5. Bring soup to a boil. Reduce to low and allow to simmer 10-15 minutes.
6. Meanwhile, boil potatoes about 10 minutes or until tender.
7. Add potatoes and tortellini. Cook about 10 more minutes, until tortellini is fully cooked.

The ruling:
If I could do anything in life, it would be to open a soup and sandwich coffee/book shop. I can't believe how good this is. I can't believe I've never had Italian sausage before. At the risk of sounding corny, I feel like my taste buds are doing a little dance right now! This is truly different from anything I've ever tasted! I was worried about the cheese tortellini since the last soup I used it in, we found it bland, but in here it really picked up the flavor. I am so glad I decided to go out of my comfort zone and try this.

Sticky Roast Chicken #24


I'm not exactly sure what sticky roast chicken means, but that is the title of the recipe calls it. Learning to make a roast chicken is the whole reason I started this blog. I've tried and failed in my opinion several times now. Since I have tried last, I dropped and broke my fancy chicken roaster that sits the chicken right side up. Today I'm using my large stoneware deep covered baker from Pampered Chef. Now I'll already admit to my first problem with this. You can put a 5 pound chicken in there, well my chicken in almost 6 pounds. Next time I'll know this, but I don't know what else to cook it in so in the oven it went.

The case:

Ingredients
* 4 teaspoons salt
* 2 teaspoons paprika
* 1 teaspoon onion powder
* 1 teaspoon dried thyme
* 1 teaspoon white pepper
* 1/2 teaspoon cayenne pepper
* 1/2 teaspoon black pepper
* 1/2 teaspoon garlic powder
* 2 onions, quartered
* 2 (4 pound) whole chickens

Directions
1. In a small bowl, mix together salt, paprika, onion powder, thyme, white pepper, black pepper, cayenne pepper, and garlic powder. Remove and discard giblets from chicken. Rinse chicken cavity, and pat dry with paper towel. Rub each chicken inside and out with spice mixture. Place 1 onion into the cavity of each chicken. Place chickens in a resealable bag or double wrap with plastic wrap. Refrigerate overnight, or at least 4 to 6 hours.
2. Preheat oven to 250 degrees F (120 degrees C).
3. Place chickens in a roasting pan. Bake uncovered for 5 hours, to a minimum internal temperature of 180 degrees F (85 degrees C). Let the chickens stand for 10 minutes before carving.

The ruling:
Since I only had 1 larger chicken, I put all the seasoning on one chicken and Googled cooking times. I found 20 minutes per pound at 350 several places, so this is what I did. A couple of reviewers said they cooked it higher for the first 15 minutes and the last 15 minutes so I cooked it at 425 for the first 15 and last 15 minutes, hoping to yield a crisper crust. This chicken was absolutely delicious! I know I will be making this again and again and again for years to come. I'm not sure if it was marinating it overnight, the recipe itself, or the Pampered Chef Baker, but whatever it is- it worked! I'm definitely going to use the marinating overnight technique and my PC Baker to try other recipes!

Saturday, February 13, 2010

Lemon Tea Cookies #23


I love thumbprint cookies and I love lemon so I thought these sounded good. Michael loves lemon anything and I wanted to make him some type of Valentine's Day dessert we could take to Nashville with us. We're going to see a play tonight and are going out of eat. I figured these would be the perfect tag-along for afterwards.

The case:

Ingredients
Cookies
* 1 cup butter or margarine, softened
* 1/3 cup powdered sugar
* 1 teaspoon vanilla
* 1 2/3 cups flour
* 1 tablespoon powdered sugar

Filling
* 2/3 cup granulated sugar
* 3 teaspoons lemon peel, grated
* 3 tablespoons lemon juice
* 1 tablespoon butter or margarine
* 1 teaspoon cornstarch
* 1/4 teaspoon salt
* 1 egg, beaten

Directions
1. In large bowl, Beat butter, 1/3 C powdered sugar, and vanilla with mixer on medium speed until well blended.
2. Stir in flour until dough forms.
3. Cover; refrigerate 30 minutes
4. Heat oven to 350°F Shape dough into 1" balls.
5. Place balls 2" apart. Press thumb into center of each ball to make indentation.
6. Bake 8 to 10 minutes or until golden brown.
7. Remove to cooling racks and cool completely, about 30 minutes.
8. In 1 qt saucepan, heat all filling ingredients over low heat about 25 minutes, stirring constantly, until smooth and thickened.
9. Cool about 15 minutes.
10.Fill each thumbprint with rounded 1/4 tsp filling. Sprinkle 1 T powdered sugar over cookies.

The ruling:
Where to begin? I had trouble keeping these cookies together after they came out of the oven. They were better after cooling for 30 minutes, but didn't have the great flavor I enjoy in "sugar" cookies. Then I didn't have any cornstarch for the icing so I tried adding some flour but it never thickened right; so I added about a cup of confectioners sugar like I would regular icing. Then, I added some lemon extract and yellow food coloring. All in all, this was not worth the time or effort. Michael ate most of the cookies. They weren't bad, but I know there are simpler and more tasty lemon cookie and thumbprint cookie recipes out there.

Friday, February 12, 2010

Chicken Pasta Milano #22


I wanted to kick up Valentine's Day weekend up a notch and cook some fun, fancier recipes. Here is the first one.

The case:
Ingredients
* 1 tablespoon butter
* 2 cloves garlic, minced
* 1/2 cup sun-dried tomato, chopped
* 1 cup chicken broth, divided
* 1 cup heavy cream
* 4 boneless skinless chicken breasts
* 1 teaspoon salt
* 1 teaspoon pepper
* 2 tablespoons olive oil
* 2 tablespoons basil
* 8 ounces angel hair pasta, cooked and drained

Directions
1. In a large saucepan, melt butter over low heat.
2. Add the minced garlic and cook for about a minute.
3. Add tomatoes and 3/4 cup of chicken broth.
4. Increase heat to medium and bring mixture to a boil.
5. Reduce heat and simmer uncovered, for about 10 minutes.
6. Add cream and bring to a boil again, stirring frequently.
7. Simmer over medium heat until sauce is thick.
8. Sprinkle salt and pepper over both sides of chicken.
9. Heat the olive oil in a skillet, then add chicken and saute until chicken is no longer pink inside.
10.(About 4 minutes each side should do it.) Remove chicken from skillet, drain fat from skillet.
11. In the same skillet, stir 1/4 cup chicken broth with the pan juices, and bring to a boil; reduce slightly and add to the cream sauce; stir in basil.
12. Serve chicken atop the pasta, coat with the cream sauce.

The ruling:
This is decent. Not at the top of the pasta recipes I've tried. I added Parmesan, salt, and pepper to the sauce and that helped. I loved the chicken! (I added onion and garlic powder before cooking.) On the other hand, Michael really liked it, but I probably won't be making it again.

Cheesy Garlic Bread #21


Needed some kind of bread to go with my pasta. This looked good!

The case:
Ingredients
* 1 loaf French bread, unsliced
* 1/2 cup butter
* 2 garlic cloves, halved
* 1 teaspoon dried parsley
* 1/3 cup grated Parmesan cheese

Directions
1. Preheat oven to 375F degrees.
2. Cut slices down the length of bread loaf at 1 inch intervals, without cutting all the way through.
3. Rub slices and top of loaf with cut sides of garlic.
4. Mince garlic.
5. Combine butter, garlic, parsley and Parmesan.
6. Spread butter mixture between bread slices and on top of loaf.
7. Wrap bread in foil leaving top partially uncovered.
8. Bake until heated through, about 15 minutes.

The ruling:
Okay even though I wasn't a fan of the pasta, I would have never made this bread without it, so it was all worth it. This bread was absolutely delicious! I Loved, Loved, Loved it- couldn't stop eating. This is going in my favorite's book.

Sunday, February 7, 2010

Southwestern Sausage & Black Bean Dip #20


Yay I'm 1/5 of the way to my goal and it is only the beginning of February! I cannot wait to try this dip. I got it from another recipe blogger.

The case:
3/4 lb sausage, cooked and crumbled (Jimmy Dean Light)
6 oz cream cheese, softened
3/4 cup plain Oikos Greek yogurt
2 cups cheddar cheese, shredded (I used Mexican cheese blend)
1 can Rotel tomatoes, drained
1 can black beans, drained

Mix together and pour in baking dish. Bake at 350 for 30-14 minutes, or until bubly. Serve with tortilla chips and/or fritos.

The ruling:
Absolutely delicious! I loved these!

Chocolate Chip Cheeseball #19


One of the teachers I worked with in Knoxville used to make this for special occasions. It was always one of my favorites. I've never shaped a cheese ball before. Hope this turns out like hers!

The case:

Ingredients
* 1 (8 ounce) package cream cheese, softened
* 1/2 cup butter, softened
* 3/4 cup confectioners' sugar
* 2 tablespoons brown sugar
* 1/4 teaspoon vanilla extract
* 3/4 cup miniature semisweet chocolate chips
* 3/4 cup finely chopped pecans

Directions
1. In a medium bowl, beat together cream cheese and butter until smooth. Mix in confectioners' sugar, brown sugar and vanilla. Stir in chocolate chips. Cover, and chill in the refrigerator for 2 hours.
2. Shape chilled cream cheese mixture into a ball. Wrap with plastic, and chill in the refrigerator for 1 hour.
3. Roll the cheese ball in finely chopped pecans before serving.

The ruling:
Not the easiest to make, but not the hardest either. Most of my super bowl part peeps really liked this. I think this looks fancier than it is. I will make this again.

Baked Buffalo Wings #18


Super Bowl Recipe #2. I love buffalo wings, and my favorite ones are breaded. I was intrigued by this recipe because they have flour on them, but they are baked- not fried.

The case:

Ingredients
* 3/4 cup all-purpose flour
* 1/2 teaspoon cayenne pepper
* 1/2 teaspoon garlic powder
* 1/2 teaspoon salt
* 20 chicken wings
* 1/2 cup melted butter
* 1/2 cup hot pepper sauce (such as Frank's RedHot®)

Directions
1. Line a baking sheet with aluminum foil, and lightly grease with cooking spray. Place the flour, cayenne pepper, garlic powder, and salt into a resealable plastic bag, and shake to mix. Add the chicken wings, seal, and toss until well coated with the flour mixture. Place the wings onto the prepared baking sheet, and place into the refrigerator. Refrigerate at least 1 hour.
2. Preheat oven to 400 degrees F (200 degrees C).
3. Whisk together the melted butter and hot sauce in a small bowl. Dip the wings into the butter mixture, and place back on the baking sheet. Bake in the preheated oven until the chicken is no longer pink in the center, and crispy on the outside, about 45 minutes. Turn the wings over halfway during cooking so they cook evenly.

The ruling:
Everyone really liked these. I had trouble getting the breading crisp so I turned up the oven to 450 for and baked both sides for about 8 minutes. Definitely a great alternative to fried wings.

Betty White's Chicken Wings #17


This is one out of four new recipes I'm trying out for the Super Bowl!

The case:
Ingredients
* 3 lbs chicken wings (use the plumpest chicken wings you can find)
* 1/2 cup margarine or butter
* 1 cup soy sauce
* 1 cup brown sugar
* 3/4 cup water
* 1/2 teaspoon dry mustard
* 3/4 teaspoon garlic powder (optional)

Directions
1. Arrange wings in shallow baking pan.
2. Heat butter, soy sauce, sugar, water mustard and garlic powder if using, until butter and sugar melt.
3. Cool; pour over wings and marinate at least 2 hours, turning once or twice.
4. Bake in same pan at 375F for 1-1/4 to 1-1/2 hours, turning occasionally. (Use the plumpest chicken wings you can find; if your market only has the normal scrawny ones, don't cook longer than 75 minutes)
5. Drain on paper towels and serve.

The ruling:
One of my friends declared these her favorite wings she'd ever had. I agreed they were very good. I will make these again. I will probably pour some of the sauce out next time. I feel they will caramelize better.

Thursday, February 4, 2010

Maple Salmon #16


Thawed out salmon earlier this week without really having a plan for it. This was the top baked salmon recipe on allrecipes.com, and I just happened to have all the ingredients so I figured I would try it!

The case:
1/4 cup maple syrup
2 tablespoons soy sauce
1 clove garlic, minced
1/4 teaspoon garlic salt
1/8 teaspoon ground black pepper
1 pound salmon

1. In a small bowl, mix the maple syrup, soy sauce, garlic, garlic salt, and pepper.
2. Place salmon in a shallow glass baking dish, and coat with the maple syrup mixture. Cover the dish, and marinate salmon in the refrigerator 30 minutes, turning once.
3. Preheat oven to 400 degrees F (200 degrees C).
4. Place the baking dish in the preheated oven, and bake salmon uncovered 20 minutes, or until easily flaked with a fork.

The ruling:
This just wasn't my flavor. I am very picky about fish and basically only like it with a major citrus influence.